Candle Making Supplies
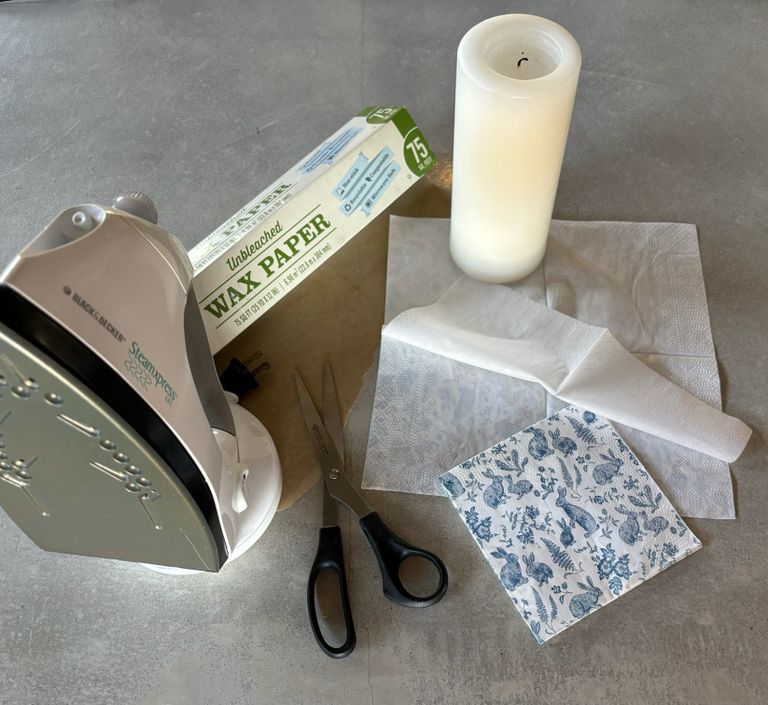
Collect wax paper, clothes iron, scissors, a pillar candle and a printed napkin. This is a 2 ply napkin with classic blue bunny print. Before you start to melt the napkin onto the candle you must cut the napkin to size and peel away the thin paper backing of the napkin.

Battery Candles vs Traditional
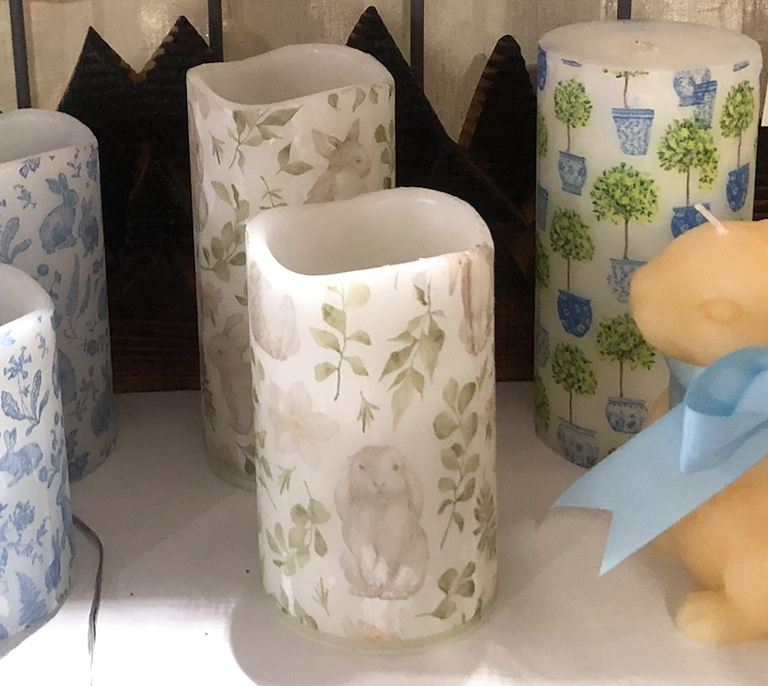
I was pleased to find that the project worked on natural candles and the set of electric candles. As long as you can scratch the service of the candle with your nail and the electric candle is set in real wax it should work.
Works on electric candles too if they are cased in wax!
How to Melt an Easter Paper Napkin onto a Wax Pillar Candle Using a Clothes Iron
If you're looking for a creative way to personalize a wax pillar candle, try transferring an Easter-themed paper napkin design using a clothes iron. This simple DIY project will leave you with a beautiful, customized candle perfect for your seasonal décor or as a gift. Here's how to do it:
What You’ll Need:
- A plain wax pillar candle
- Easter-themed paper napkins (or any decorative napkin)
- Scissors
- Wax paper
- A clothes iron (set to low heat)
Step-by-Step Instructions:
1. Prepare the Napkin Design Start by choosing a napkin with an Easter design you want to transfer. Carefully separate the printed top layer of the napkin from the plain backing layers. Trim around the design, leaving only the part you wish to apply to the candle.
2. Position the Napkin on the Candle Place the decorative napkin piece on the surface of the wax pillar candle. Ensure it is smooth and wrinkle-free.
3. Wrap the Candle with Wax Paper Cut a piece of wax paper large enough to wrap around the candle, covering the napkin design. Make sure the glossy side of the wax paper faces the candle. Hold the wax paper tightly around the candle, with the ends overlapping at the back.
4. Apply Heat with the Clothes Iron Set your clothes iron to a low heat setting (avoid steam). Carefully press the iron over the area covered by the wax paper, applying gentle pressure. Move the iron slowly to ensure even heating. The heat from the iron will melt the wax layer just enough to bind the napkin design to the candle surface.
5. Smooth and Secure After heating, allow the candle to cool slightly before peeling away the wax paper. If you notice any areas that haven't adhered properly, rewrap the wax paper and apply the iron again for a few seconds.
6. Finishing Touches Once the design is fully transferred, let the candle cool completely. You can gently press down any edges or bubbles with your fingers while the wax is still soft.
Tips for Success:
- Use low heat to prevent melting the candle too much or causing drips.
- Work in small sections if transferring a large design to ensure even adhesion.
- Keep the iron moving slowly and evenly for the best results.
Enjoy Your Custom Candle Creation.
Now you have a stunning, personalized Easter candle that showcases your creativity! Display it proudly in your home or share it as a thoughtful gift. This simple technique can be used with different napkin patterns and candle types to create a variety of unique designs for any occasion.

PO BOX 16057 Golden, CO 80402
©Copyright 2024. All rights reserved.
We need your consent to load the translations
We use a third-party service to translate the website content that may collect data about your activity. Please review the details in the privacy policy and accept the service to view the translations.
